My New Home Lab Journey
My New Home Lab Journey
Welcome to my blog where I share my journey of setting up a new home lab. This setup is a dream come true for any tech enthusiast and I’m excited to document every step of this adventure.
The Heart of the Lab: Hardware Specifications
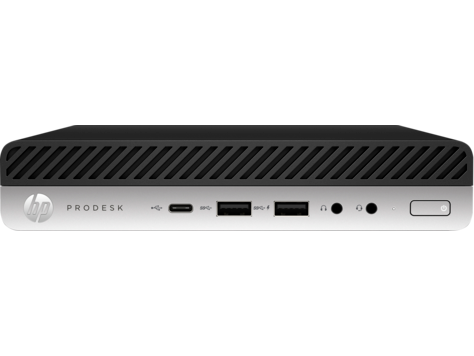
The core of my home lab consists of three HP ProDesk 600 G4 Mini PCs.
These compact powerhouses are equipped with impressive hardware and some notable features:
- CPU: Intel® Core™ i3-8100T
- RAM: 32 GB each
- Storage: 2 TB NVMe SSD each
- Graphics: Integrated Intel Graphics for efficient hardware transcoding
One of the most remarkable aspects of these Mini PCs is their low power consumption. This makes them not only environmentally friendly but also cost-effective to run, especially important for a lab that operates continuously.
Setting Up: The Software Installation
Setting up the software was a crucial part of this journey. I followed a comprehensive guide to import the drivers into my Microsoft Deployment Toolkit (MDT) server. Here’s how I did it:
- Step 1: Driver Import Guide Part 1
- Step 2: Driver Import Guide Part 2
- Step 3: Driver Import Guide Part 3
Following these steps, I performed a clean installation using MDT, which streamlined the process and made it highly efficient.
Software Setup: Server 2019 with Hyper-V
An essential part of my lab is the software infrastructure. I have installed Server 2019 Standard Edition with Hyper-V on each of the Mini PCs. This setup allows me to create and manage multiple virtual machines efficiently, providing a flexible and powerful environment for various projects.
Installing Hyper-V
I followed a detailed guide to install the Hyper-V role on Server 2019. The process is thoroughly documented here: Installing Hyper-V Role on Server 2019. This guide made the installation process straightforward and hassle-free.
Creating a VM Template
To streamline the creation of new virtual machines, I’ve set up a VM template. This template serves as a blueprint for quickly deploying new VMs without having to configure each one from scratch. You can find the detailed process I followed here: Creating Hyper-V VM Templates. This approach saves a significant amount of time and ensures consistency across various VM deployments.
Network Configuration: The Backbone of Connectivity
Currently, my entire lab network is connected via a 1 Gbit Ethernet to a USW-24 switch. This setup offers a robust and reliable network backbone, ensuring smooth communication between the devices. The 1 Gbit connection provides ample bandwidth for most of my current projects, which include software development, testing, and general experimentation.
Future Expansion Plans: Embracing Higher Speeds
Looking ahead, I’m considering an upgrade to a 2.5 Gbit network. This would significantly enhance data transfer speeds, making my lab more suitable for higher-end tasks that require faster networking, such as large-scale simulations or intensive data processing.
The transition to 2.5 Gbit would involve:
- Upgrading Network Hardware: Including a new switch and network cards capable of supporting 2.5 Gbit speeds.
This upgrade isn’t just about speed; it’s about future-proofing my lab and preparing it for more advanced projects.
The Future of My Home Lab
This new home lab is not just a setup; it’s a stepping stone towards many future projects. I plan to use this lab for:
- Experimenting with new technologies: This lab will be my playground for testing and learning new tech.
- Developing and testing software: A perfect environment for software development and testing.
- Educational Purposes: I aim to use this lab as a learning tool for various IT and networking concepts.
Stay tuned as I dive deeper into the world of technology with my new home lab. I’ll be sharing more updates, projects, and insights right here on this blog.
Happy Labbing!


